This blog will demonstrate how to setting up a simple HTTP server on ESP8266 which is on Node MCU module and access the data sent by ESP8266 on HTTP webpage on any of the browser.
Before going further, I hope that you already know how to make Arduino IDE identify the NodeMCU board and program this module by use of Arduino IDE Software. If not, please go through previous blog of mine which explains how to use NodeMCU with Arduino IDE.
Below is the program for setting of simple HTTP web server on ESP8266 and connecting it with WiFi.
Program on Arduino Software
You can copy and paste whole program from here.
Compile it and Upload it on NodeMCU Board and observe the output on http webpage or serial monitor.
//Program starts here
#include <ESP8266WiFi.h>
#include <ESP8266WebServer.h>
#include <ESP8266mDNS.h>
const char* ssid = “puru”;
const char* password = “purushottam”;
ESP8266WebServer server(80);
void handleRoot() {
server.send(200, “text/plain”, “hello from esp8266!, Purushottam, How are You ??”);
}
void handleNotFound(){
String message = “File Not Found\n\n”;
message += “URI: “;
message += server.uri();
message += “\nMethod: “;
message += (server.method() == HTTP_GET)?”GET”:”POST”;
message += “\nArguments: “;
message += server.args();
message += “\n”;
for (uint8_t i=0; i<server.args(); i++){
message += ” ” + server.argName(i) + “: ” + server.arg(i) + “\n”;
}
server.send(404, “text/plain”, message);
}
void setup(void){
Serial.begin(115200);
WiFi.begin(ssid, password);
Serial.println(“”);
// Wait for connection
while (WiFi.status() != WL_CONNECTED) {
delay(500);
Serial.print(“.”);
}
Serial.println(“”);
Serial.print(“Connected to “);
Serial.println(ssid);
Serial.print(“IP address: “);
Serial.println(WiFi.localIP());
if (MDNS.begin(“esp8266”)) {
Serial.println(“MDNS responder started”);
}
server.on(“/”, handleRoot);
server.on(“/inline”, [](){
server.send(200, “text/plain”, “this works as well”);
});
server.onNotFound(handleNotFound);
server.begin();
Serial.println(“HTTP server started”);
}
void loop(void){
server.handleClient();
}
//Program ends here
Explanation of Program:
#include <ESP8266WiFi.h>
#include <ESP8266WebServer.h>
Above two libraries include the ESP8266WiFi library, which will make available the functionality needed for the ESP8266 to connect to a WiFi network.
For multicast DNS support, we need to have #include <ESP8266mDNS.h>
Next, we declare a global object variable from the previously mentioned class, so we will be able to access it in our functions.
As argument for the constructor of this class, we will pass the port where the server will be listening to which is 80.
ESP8266WebServer server(80);
ssid and password of the wifi is defined where we want ESP8266 to get connected
most of the coding is done in the setup function.
First of all, we open a serial connection for debugging.
Serial.begin(115200);
Then, we will need to connect to the WiFi network, as shown with the code below.
WiFi.begin(ssid, password);
Serial.println(“”);
// Wait for connection
while (WiFi.status() != WL_CONNECTED) {
delay(500);
Serial.print(“.”);
}
we need to know the IP where the ESP8266 is listening to incoming requests, which will be the local IP assigned in the WiFi network.
Serial.println(WiFi.localIP()); this method will call the localIP method on the WiFi global variable and then print it to the serial port, so we will know which URL to call on our web browser.
to start mDNS, below code is needed but since we are not going to resolve any multicast domain name system (mDNS) here, you can kip the below two lines here.
if (MDNS.begin(“esp8266”)) {
Serial.println(“MDNS responder started”);
}
Then, we will start to specify which code to execute when an HTTP request is performed to each path. To do so, we call the on method on our previously declared server global object.
server.on(“/”, handleRoot);
So, the code mentioned bellow indicates that when an HTTP request is received on the root (“/”) path, it will trigger the execution of the handleRoot function and to define an answer to a request, we call the send method on our server object.
void handleRoot() {
server.send(200, “text/plain”, “hello from esp8266!, Purushottam, How are You ??”);
}
In this case, we are sending the code 200, which corresponds to the “OK” response. Then, we are specifying the content type as “text/plain“, since we are only responding with a simple “hello from esp8266!, Purushottam, How are You ??”, and finally the actual response text.
Naturally, this function needs to be declared outside the setup function.
We can also specify the handling function when calling the on method. In this case, we don’t need to declare a separate function and we can do everything in the setup function, as demonstrated bellow.
server.on(“/inline”, [](){
server.send(200, “text/plain”, “this works as well”);
In this case, if we receive an HTTP request in the path “/inline”, we will answer with a “Other URL” sentence.
we call the onNotFound method on our previously declared server global object as shown below
server.onNotFound(handleNotFound);
handleNotFound function will be executed at that time.
Now, to start our server, we call the begin method on the server object. This is the last line of code we need to include in our setup function.
server.begin();
Finally, to handle the actual incoming of HTTP requests, we need to call the handleClient method on the server object, on the main loop function.
void loop(void){
server.handleClient();
}
Demo of the Program
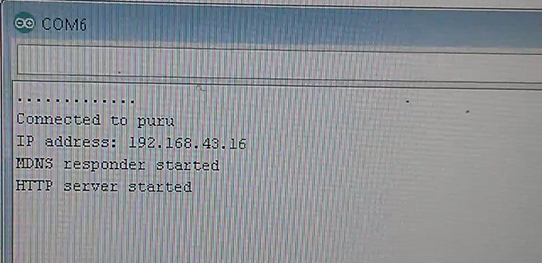
Here is the snapshot of the Serial Monitor which displays the IP address of the web server running on ESP8266
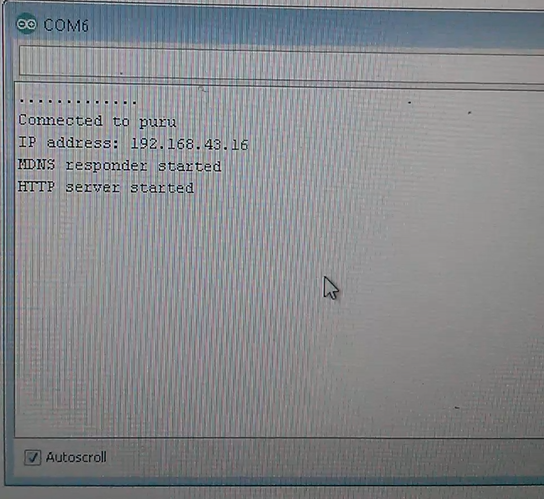
Fig 1: IP address shown on the serial monitor
If you open this particular IP address on any of the web browser, we can observe the data “hello from esp8266!, Purushottam, How are You ??” which is send on server by this ESP8266 WiFi SoC.
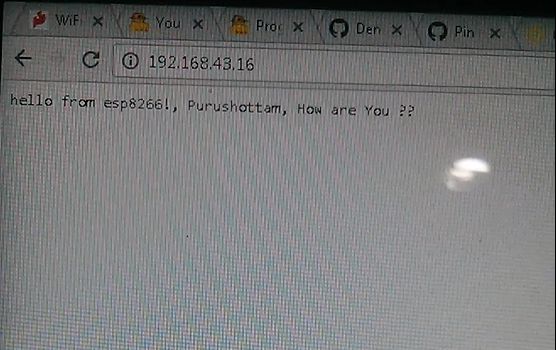
Fig 2: Data sent from ESP8266 can be observed on Web browser
Please look at the whole demonstration on Youtube.
-Signing Off, Arduino Novice
Please do follow my Blog and subscribe to my Youtube Channel for more demos and videos related to Arduino.

thanks for this ..
LikeLiked by 1 person